We have learned some things about the VMIVME-7648 controllers and the vme software that we have. The main issue is that the vmisft software that we have will only compile on a 2.4 kernel. Thus, our previous installation of SLC4.5 (basically RHEL4) with its 2.6 kernel would not work. So the first step is to install something with a 2.4 kernel. For us, we used SLC306 (derived from RHEL3) because we had the disks.
Our first attempt was to simply do the installation just as we had done previously–connect our multicard reader to a pc with no other drives and install. We had a problem in that our multicard reader always showed a disk for each type of card. This meant that during the installation, an error would come up about there not being /dev/sda present. The compact flash card always came up as /dev/sdb. In the SLC45 installation, we could simply cancel this error and move on to the next disk. However, in the SLC306 installation, canceling this error led to the automatic closing of the installation program. We got lucky in that a new multicard reader we bought did not have this problem. The compact flash card in that reader showed as /dev/sda, which solved all our problems.
For reference, the model we used is the Verbatim Universal Card Reader 15-in-1, manufacturer part number 95343.

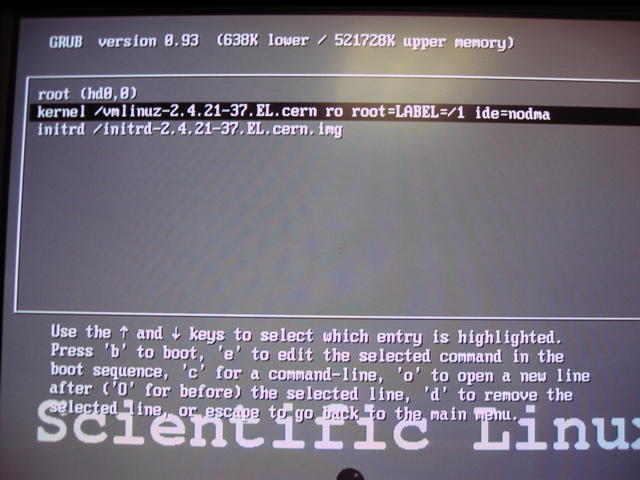
Once the operating system was installed, the compact flash card was installed into the vme controller. When grub started, we needed to stop the boot process and edit the boot options. We needed to add ide=nodma to the end of the kernel line.
Then, during the boot process, it will find that a lot of hardware had changed. Just delete anything that it says is missing and configure any new hardware. This will require the network cards to be reconfigured.
Once the system is up. Edit the file /etc/grub.conf with the ide=nodma bit so that this is always present. Also, it’s a good idea to disable the second network card, if it’s not needed. This is done in /etc/sysconfig/network-scripts/ifcfg-eth0 and ifcfg-eth1. Just change ONBOOT=yes to ONBOOT=no for whichever one is not needed.
Next, compile and install the vmisft software. It can be downloaded here.
vmisft software
Unzip and untar the file. Then run make and make install to install the software. Next you need to make sure that the vme_universe module is loaded whenever the computer is turned on. Add the following to /etc/rc.d/rc.local:
# Load vme module
modprobe vme_universe
To check that everything is working, simply type:
modprobe vme_universe
to load the module immediately. Run lsmod to check that the module is loaded. Once it’s loaded, the vmisft directory has a test program. Run:
cd vmisft-7433-3.6/vme_universe/TOOLS
./hello_vme
If everything is working correctly, you’ll get a message like this:
Bus handle value 3
We're ready to start accessing the bus now!
If things are not working, the error message will be:
Cannot initialize the VMEbus
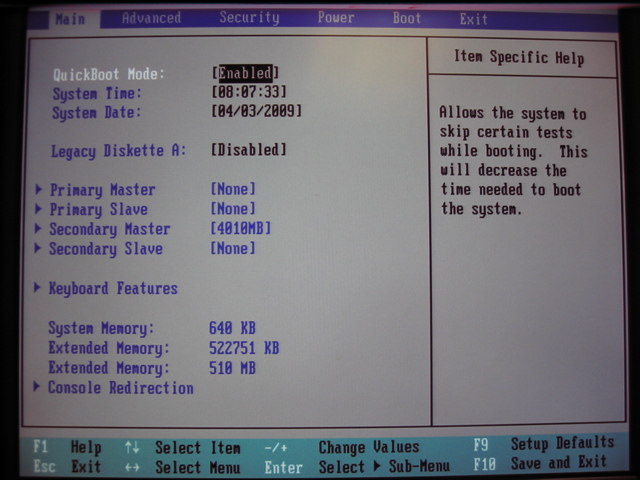
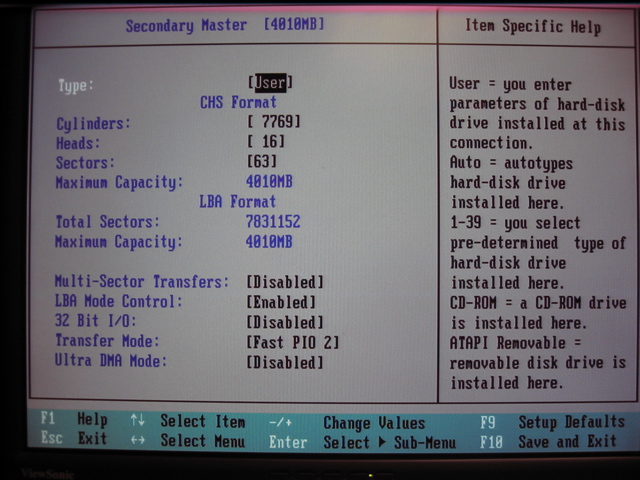
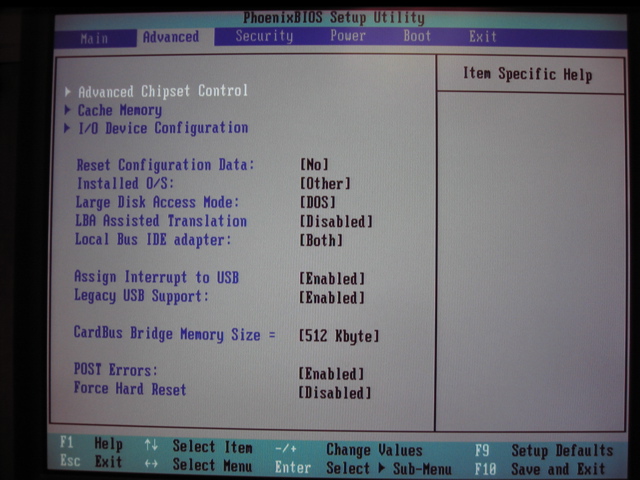
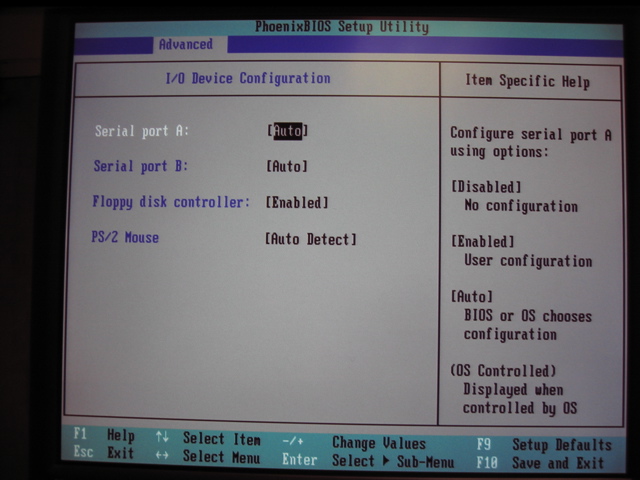
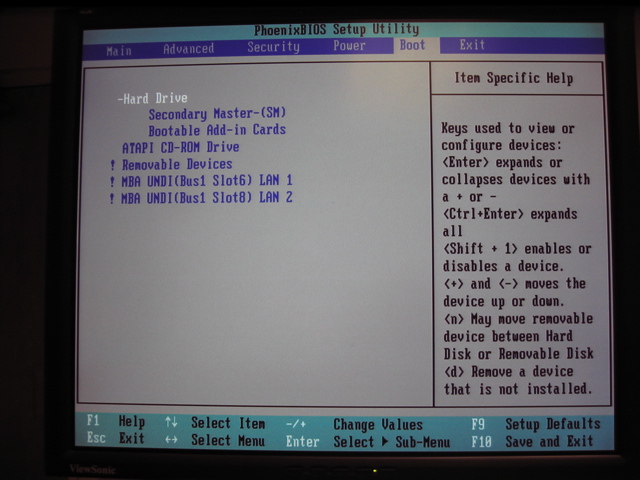
Some other issues that we had with these controllers had to do with the bios. The following are some screenshots showing how things should be set up. Only screens changed from the default are shown.